Let’s turn a photo into a movie poster-like painting. The list of steps required is a bit longer than usual, but believe me, it’s worth it.
Load the photo
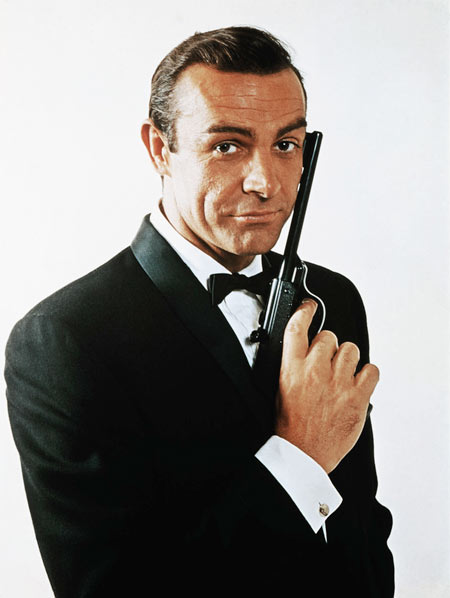
First of all, choose a good photo as an ingredient for your movie-poster painting. Here’s for example, the ever-young agent 007, straight from the 60’s.
Filtered from the top
Duplicate your layer using Layer/Duplicate Layer command and stay on the newly made layer, whose automatic name will be Background Copy if you are a Photoshop user.
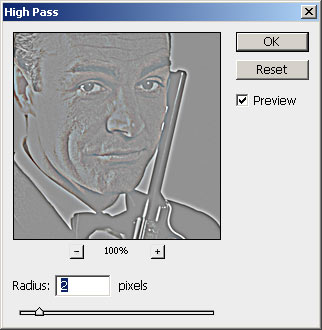
Select Filter/Other High Pass effect and then write 2.0 as the Radius value.
More blur
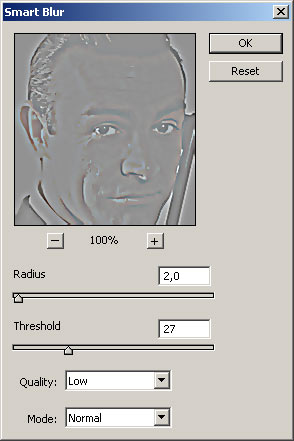
The aim of this layer is to preserve the major lines and details, but not all of them are needed otherwise it all remains too photo-like. Filter/Blur/Smart Blur filter will blur most of the image, keeping only the most important lines. We used 2.0 Radius value here as well, and Threshold value is 27.
Back to the origins
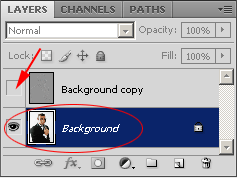
Now step back to the original layer (Background), and as the Background copy which we have just modified is not needed now, you can switch it off temporarily by the Show All icon. The layer underneath should be selected.
Too much contrast

Since the original photo has too much contrast, we have brightened black a bit because we are about to increase contrast and so many details would be lost.
We used Image/Adjustments/Shadows/Highlights command and in the appearing window we set brightness value to 59% in the Shadows section.
This step is not mandatory if you work with a photo that has less contrast.
Tough sharpening
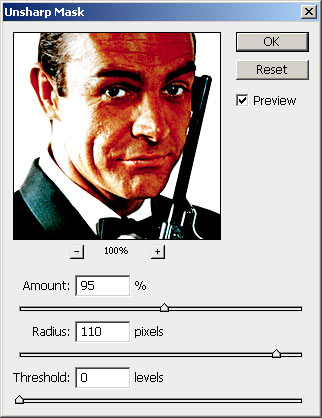
Now comes a very tough sharpening aiming at emphasizing lines. Amount value is 95% here, and Radius is 110 pixels.
This also means the high increase of contrast, that’s why it had to be decrease in the previous step.
Blur again…
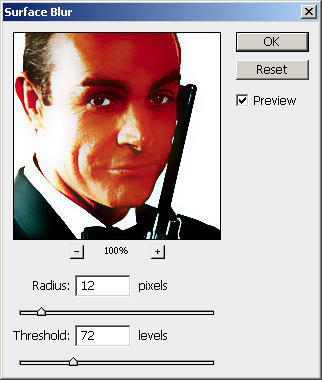
… with Filter/Blur/Surface Blur effect. This will blur – similarly to Smart Blur– only the more fine details, the lines remain the same.
We set a relatively high value, 12 pixels, but Threshold is also high, therefore many details remain. The aim is to achieve that everything is blurred apart from the characteristic lines.
Features
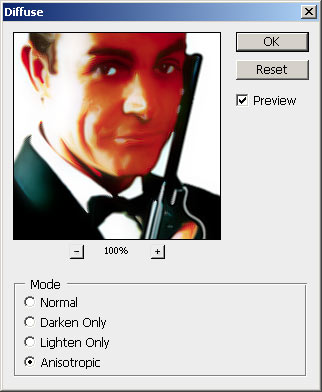
A major step is Filter/Stylize/Diffuse effect. Select Anisotropic here and the image will get soft, brush stroke-like lines as in a painting.
Alternative colors
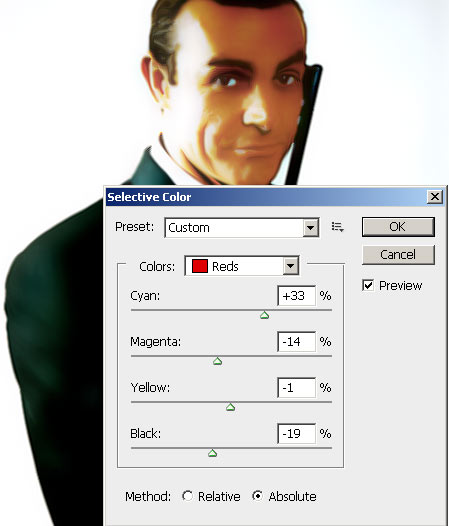
This is another step that is not mandatory.
Colors may have become too intense due to the increase in contrast. Usually this is quite okay in a painting because this may well add to the painting effect, taking it further from reality. In our case, however, the face has become annoyingly red, which we can correct using Image/Adjustments/Selective Color command and by soft-tuning the red color interval.
My name’s Bond…
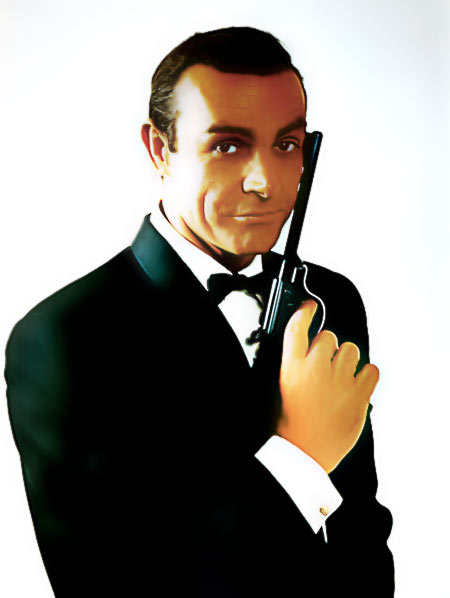
As a last step, switch on the upper layer which was switched off a couple of steps ago. It will emphasize the important lines, details, and the image will be less blurred.
And there you are, the photo has turned into a painting-like image, which can serve as a good material for a movie poster.