There is a continuous discussion about how far photographers may go in manipulating their own photos. Many say that removing annoying picture elements is beyond the borders of normal photo editing as it questions the authenticity of the photos. It is up to you to take sides in such a discussion. The following Photoshop article will help you without any remorse to quickly remove any unwanted elements from your photos.
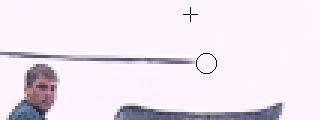
 Let’s start with a simple example. We want to remove the black power line from this picture.
 For such tasks, the most basic device is the Clone Stamp Tool (press S). Its basic feature is to take a sample from a photo part, and paint that sample or its surroundings to other areas of the picture. As you can see, it is a brush-based tool. Therefore, you should select an appropriate brush size and type before usage. To remove the power line from the picture above, we need a smaller-sized brush. Those not very experienced in cloning should use soft brushes, although this is influenced more by the actual topic, and less by practice. In this particular case, we have chosen a soft brush.
 Photoshop 7.0 and above contains a Healing Brush Tool (press J) whose function is similar to the Clone Stamp Tool. The difference is that it uses only the texture structure of the sample, But calculates the lightness and color values from the actual surroundings. We’ll explain this tool in a future lesson.
Now let’s get back to the Clone Stamp Tool.
Sampling is very easy. Choose an area that, when copied over the annoying element, will look like it had never existed. Obviously, we’ll sample the sky beside (above, under) the unwanted power line to make it disappear.
Press and hold ALT. The mouse pointer becomes crosshairs. Bring it to the area you want to sample. Still pressing Alt, click the desired location. This will be the starting point for the area you want to copy. Release Alt, and click the area you want to delete (in this example, the power line). It will be overpainted with the sampled area. Work your way through the areas you want to disappear.
Before you start this procedure, make sure that you have checked Aligned in the options dialog for the Clone Stamp Tool. If you haven’t, then releasing the mouse button while painting (and you’ll certainly do so sometimes) copying will begin anew from the point you’ve selected while pressing Alt. If Aligned is checked, the program keeps a constant distance between the sampled area and the destination. The copied area is marked with a + sign. This is the area Photoshop samples. For example, when sampling the sky, it is recommended to use the latter method.

Mind the colors of the sky and the clouds while painting. Don’t paint blue sky into the middle of a cloud or work it out. Make the different colors look natural! You can even stop cloning and take another sample from a different area. Cloned areas always look more natural (especially when cloning more complex textures) if you copy only small areas and constantly take newer samples while removing the element. You can even overpaint an area you’ve done once with a different sample, using a lower Opacity value. The principal aim is to make the final picture look natural, as if the unwanted eleme nt had never existed.


