“But there should be details there, not whiteness!”; the good old digital cameraman could shout out in despair. Indeed, cameras are unable to reflect the exact sight our eyes take in. Sometimes what should be a photo image is just something made up of black-and-whites patches with contrast. To bring burnt-out areas back to life is more difficult than brightening shady areas. In fact it’s almost impossible, but it’s worth a try.
Load the photo in Photoshop Elements
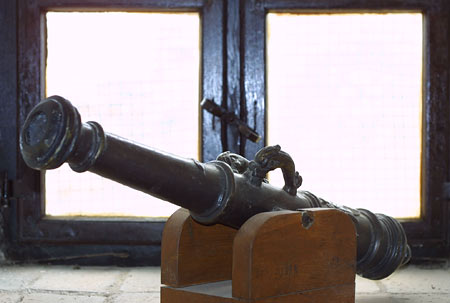
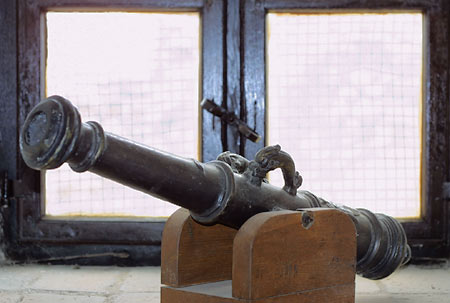
It is quite difficult for a digital camera to achieve the appropriate contrasts in such counter-light. The dark areas remain black shades, while the brighter areas will burn out. Quite often, not even flash illumination will help. In the picture above it is quite disturbing that the windows are just two white stains. Let’s try and do something about it.
On a copy
First of all, click Layer/Duplicate Layer. Click OK in the window that appears. You can give the new layer a name if you like. The software offers the name Background Copy.
Equation

We will work on this new layer now so do not click on the other one. Choose Filter/Adjustments/Equalize filter. By doing so, the software will try to even out the differences in brightness in the photo. It will brighten the dark areas and darken the bright ones.
The result, however, is most often simply unappealing. As you can see above, the details are now there in the white areas but the colors are askew. In many cases, Equalize will completely dismantle the picture contrasts. The end-result can be really unnatural. But that’s why we’ve created a second layer.
Mixture
The bottom layer contains the untouched original picture and so we can quickly recover the colors that have gone astray. Set effect mode on the layers palette (Layers) to Luminosity. This way, only the newly set brightness will prevail from the upper layer and colors from the bottom layer. If you find the equalization effect too strong, you can diminish it with Opacity. We used 50% so that the extent of Equalizeeffect is not conspicuous or unnatural. The result is closer to reality and the newly created window details that were burnt out before are also visible.
Unknown details
With this method certain details that were not or hardly visible before may appear now. Be very careful with this tool though. The result is not always pleasing. It is advisable to use and mix duplicate layers because this allows you to fine tune the photo afterwards easily.