It was many a sessions ago that we last dealt with saturation, which we increased with the help of Curves command. Our next tip is based on almost the same method, but if you abhor Curves, you can operate with Levels instead. A bit differently, but still, similarly.
Load the photo in Photohop
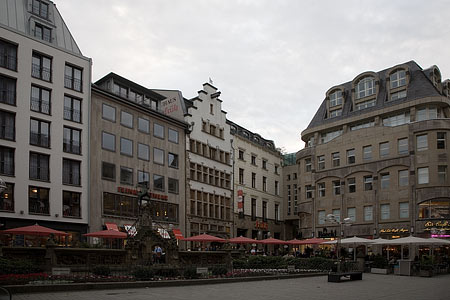
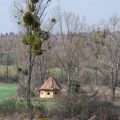
We will need a photo poor in colors. Something like the sample above, which was taken on a cloudy, dark day and is quite grey, colorless and monotonous accordingly.
A similar start
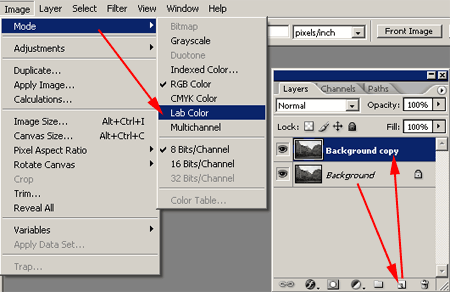
We are starting in the same way as in the previous article. Change the color mode from RGB to Lab Color in Image/Mode menu.
The next steps are different but familiar. Duplicate the present layer by dragging it (Background) to the icon selected. We will execute the increase of saturation on this layer copy.
Levels instead of curves
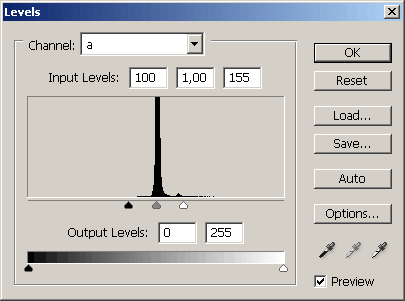
Here comes a new-old method. Step on Image/Adjustments/Levels menu, then in the opening dialog find Channel and set channel ‘a’ there. In the first window of Input Levels write a value of 100, and 155 in the third one, which means you deduct 100 from the existing value of 255. You can operate with different numbers, but it is important to deduct the same amount in the third window as what you set in the first window. The value in the second window should remain 1.00.
Do not yet click OK when you’re done.
Second “Level”
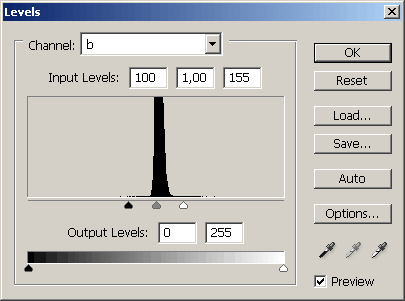
We are still in Levels window. In Channel section set channel ‘b’ now and repeat the previous step. Be careful to give the same numbers as in channel ‘a’, otherwise color balance will overturn. They were 100, 1.00 and 155 in our picture.
Now you can click OK.
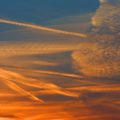
Not so strong!
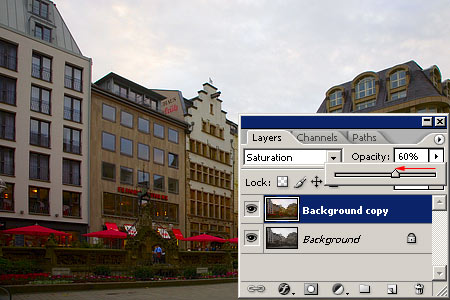
If you did everything correctly, the result is a high color saturation in your photo. Perhaps a bit too high. But we worked on the copied level channel, and so the old trick will work again. Select Saturationamong blend modes in Layers palette, then decrease Opacity slider value until you are satisfied with the saturation it results.
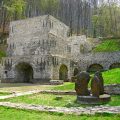
Richer in colors

The picture is now ready, and it is definitely richer in colors. Finally, the two layers need to be unified, as you don’t need the separate ones any longer. You can do this with Layer/Flatten Image command.
After unifying the levels, do not forget to switch back to RGB Lab color mode (Image/Mode/RGB Color), as you can only save the picture after that step.