An opportunity to enhance the details of a photo.
Load the photo in Paint Shop Pro
You would not say the above picture to be unsharp, but it is pretty soft, so we can greatly enhance it by emphasizing some details.
Paint Shop Pro‘s sharpening settings—four of them—can be found under Adjust/Sharpness in the menu.
Just click
If you’re cautious and would not want to fiddle with the settings, select the second item from the menu, Sharpen.
This is the simplest method. It is fully automatic, so you don’t have to specify anything. Its drawback is the same: you don’t have control over the sharpening. It applies a moderate amount of sharpening to the picture. If it seems to be less than enough, repeat the action.
The above picture shows the result in 500% zoom. The original is on the left, while the result of the Sharpen action is on the right.
A bit stronger
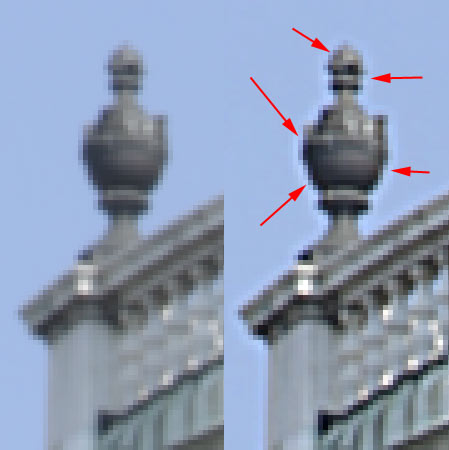
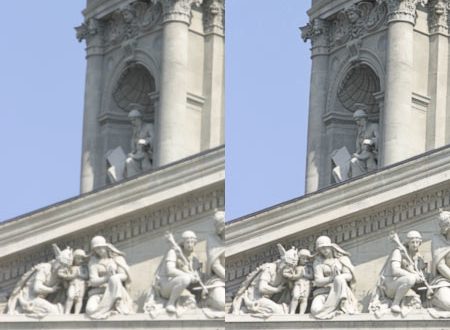
When dealing with a more blurred image, you can try Sharpen More. This has a more intense effect, and is fully automatic, just like its little brother.
Its drawback, apart from the automatism, is that the minor oversharpening causes a slight increase in noise and the excessive contrast difference of pixels along edges. This contrast difference produces another, lighter edge—this is called a halo. The image part on the right shows the unwanted contrast edge indicated by arrows.
Sharpen More should be used only for sharpening slightly blurred (not soft!) photos.
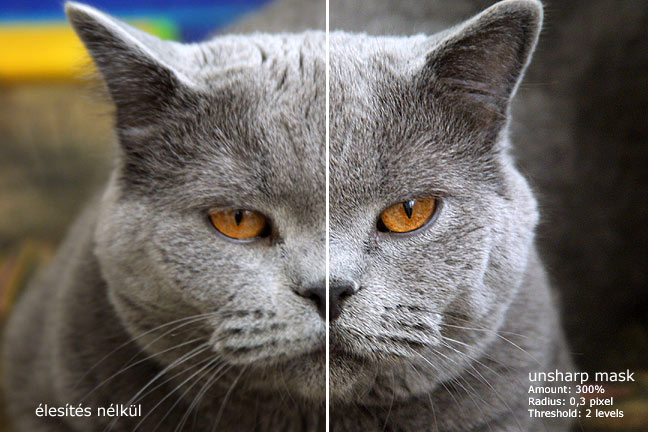
A proven method
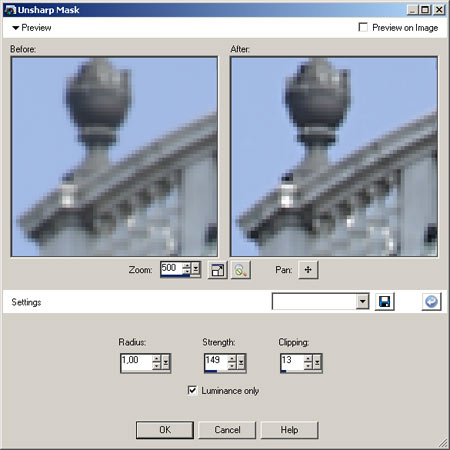
Unsharp Mask is a good old veteran feature of most image editors. This is the grandfather of all sharpening actions. It offers good control, and in proper hands, a nice result.
Click the command to display the feature’s dialog, with a part of the original image on the top left, and the sharpened variant on the right. The controls under the preview allow free resizing. You can save or load the specified values in the Settings bar.
The three (four) options at the bottom are the actual sharpening controls. Radius specifies the area (width in pixels) along the edges where sharpening will be applied. Higher values produce rough and thick edges, which can be handy for very unsharp images, but for finer detail emphasis, a setting of 0.5 to 1.0 is usually enough.Strength adjusts the intensity of sharpening from 1 to 500. Obviously, higher values mean a more intense effect. Clipping prevents sharpening the edges with less contrast. This lessens the noise increase in homogeneous areas. Increasing Clipping will also prevent the sharpening of fine details, until finally the effect will only be visible along the thickest edges. Use it cautiously, because above 10 to 15, detail emphasis is barely perceptible. However, in noisier pictures, a setting of 0 leaves more visible sharpening noise.
Under the three settings, there is a checkbox called Luminance Only. Select it to apply the sharpening only to the lightness channel and leave the color channels intact. When facing more intense color noise, you can use this setting to prevent increasing it further. Of course, the effect won’t save you from growing luminance noise.
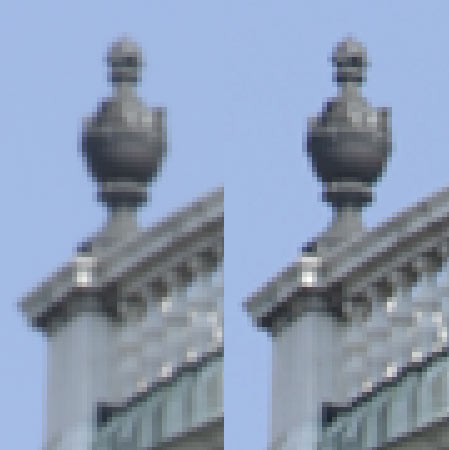
High pass

My favorite is High Pass Sharpen, which works only along the edges, producing much less halo and noise increase. This is a finer sharpening method, suitable for emphasizing tiny details, or for smaller sized images (e.g. for web galleries).
The main parameters are Radius and Strength again, their effects the same as by Unsharp Mask. Here, the upper limit for Strength is 100, which indicates pretty clearly that this is a finer tool. The third setting is Blend Mode, offering three ways of blending the original image with the sharpened one. This is also for controlling effect intensity. Soft Light produces the weakest effect, Overlay is stronger, and Hard Light is the most intense.
Obvious details
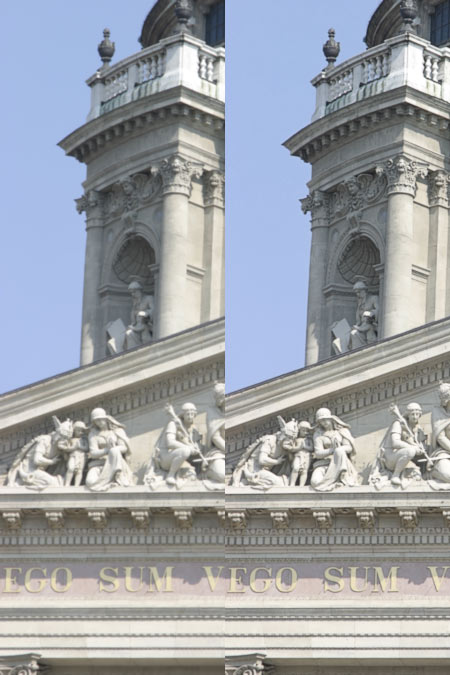
The right side of the image above shows the result of the High Pass Sharpen method. We used a Radius of 0.80 and set Strength to 100, and chose the Hard Light blending mode.
When compared to the soft effect on the left, I think it is well visible how much emphasis the finer details gained and how much more “foothold” your gaze finds in the sharpened photo.