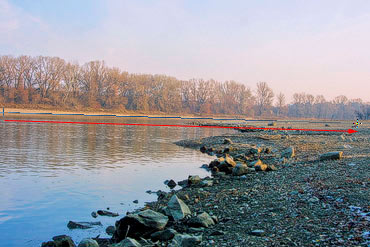
For Photoshop, we have already described a method for leveling out photos leaning to the sides. Now it’s time to explain a similar procedure to Photoshop Elements users. So much the more as this method is even simpler, since it is done with a dedicated tool. Read on, even if you have never used it.
Load the photo in Photoshop Elements
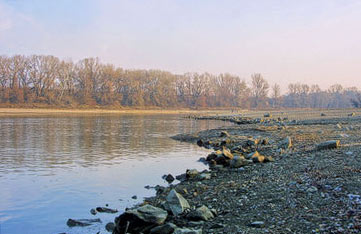
You can easily see that the horizon leans to the right. This invokes a feeling of uncertainty in spectators as we are all accustomed to the horizon being horizontal.
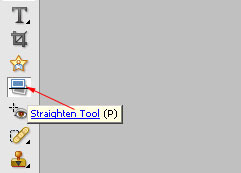
The tool
Photoshop Elements includes a dedicated Straighten Tool for such issues. It can also be found in earlier versions, around the middle of the Tools palette on the side. You can also press P to activate it.
Before you begin…
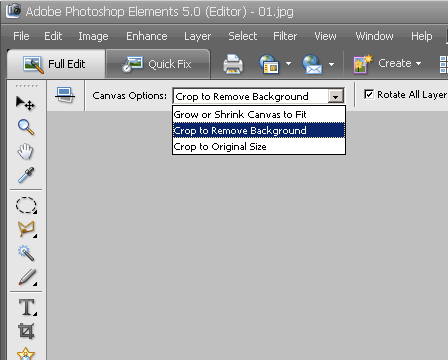
Take a look at the settings. Canvas Options control the behavior of the canvas after cropping:
Grow or Shrink Canvas to Fit: Both picture and canvas size remains unchanged, but as the picture will be rotated slightly, its edges will sport an askew border of the background color.
Crop to Remove Background: Image size stays unchanged while canvas size will be reduced to avoid borders. The photo will be of a smaller pixel size.
Crop to Original Size: Canvas size stays unchanged while the image will be enlarged to avoid borders. By larger rotations, image quality may decrease significantly.
Rotate All Layers: If you are working with multiple layers, select this check box to rotate all of them. When unselected, only the active (selected) layer will be rotated. For single-layer images, the setting is ignored.
Put it straight
Click a far point of the askew horizon and drag according to the skewness to the opposite edge of the picture. The red arrow shows the drag direction. Release the mouse button to straighten the picture.
A level horizon
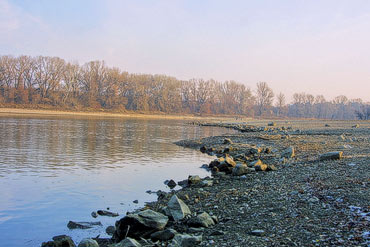
We used the Crop to Remove Background option to get rid of the borders. This way, image size was decreased a little, but a skew background border would have been more annoying. Try all the possible choices and decide which one to use according to your taste.
