Vignette and White Balance
Last time we introduced two plugins specifically made for digital photos by The Imaging Factory. Debarrelizer serves for eliminating barrel and cushion distortion as well as chromatic aberration, while Perspective helps in correcting perspective effects.
Here you are, another two plugins for Adobe Photoshop, yet again by The Imaging Factory. After installing, both can be found in the Filter/theimagingfactory menu.
Vignette eliminates (or, for that matter, creates) the darkening of image corners and edges, while White Balance corrects the color shift produced by wrongly set white balance. Let’s take a more thorough look at them!
Vignette
The corners of photos often get darker when using wide-angle lenses. This can be caused by an incorrectly chosen accessory, e.g. teleconverter or filter that simply protrudes into the picture, leaving those dark edges.
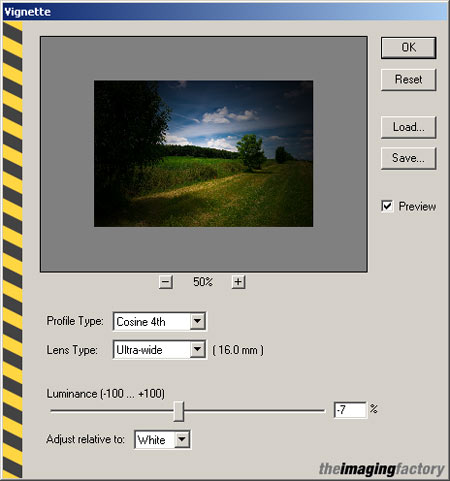
The above picture shows the Vignette dialog. The usual preview image is at the top. It can be zoomed with the +/- buttons, and is scrollable by dragging. As you have to specify the lightness for certain image areas, you can display the color channel values for any pixel on the right by hovering the mouse pointer above it. This way you can check whether the areas you want to be black or white are actually of the proper lightness.
The first list is Profile Type. It specifies the form of vignetting and has three options:
Cosine 4th, the most often used setting is useful when dealing with the darkening of image corners.
Create Radial comes handy when the problem is circular darkening. This is a rare phenomenon and is more difficult to spot. The difference shows in a circle around the center.
The same effect can occur diagonally. In such cases, Create Spatial can help.
Lens Type specifies the category and focal length of the lens used when taking the photo. Lower focal length (wider angle) means you can lighten a larger area inwards. Selecting teleobjectives enables a less intensive modification as the effect is much weaker in such cases.
Custom allows you to specify a numeric value for focal length (mm) and/or angle of view (for digital cameras, you have to specify equivalent focal length). There are five options besides Custom:
Ultra-wide: 16 mm
Wide-angle: 35 mm
Normal: 50 mm
Portrait: 75 mm
Tele: 105 mm
The heart and soul of the plugin is the Luminance slider. This removes (or adds) the darkening. Drag it towards negative values to darken the area you’ve specified by Profile Type (corners, circle in the middle, diagonal), or towards the positives to lighten it.
The last setting specifies whether the adjustment is relative to black or white. That is, White darkens or lightens the edges, while Blackdoes so for the center of the image.
The next picture to the left features a rather severe darkening at the edges. We have successfully corrected it on the right (settings: Cosine 4th, Ultra-wide, Luminance +100, White).
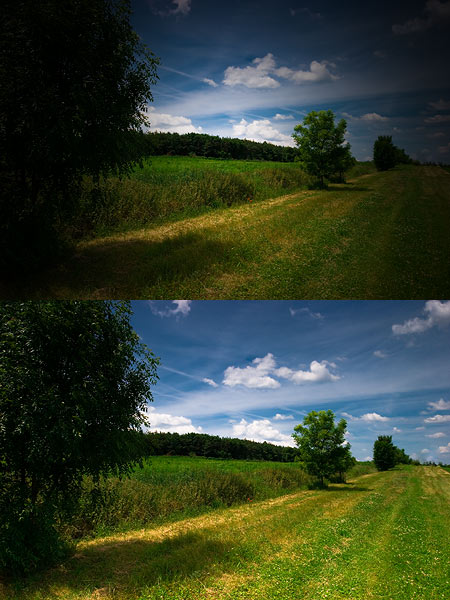
In the following pictures, however, we have set the last option to Black, and first applied lightening (Luminance +100), then darkening (Luminance -100). This way, the action affects the middle of the photo.
White Balance
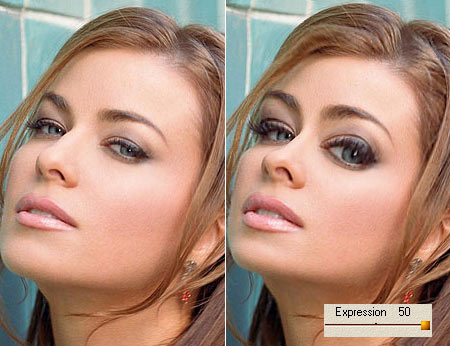
Sometimes the automatic white balance setting of your camera doesn’t do a very good job, or you might simply forget about it and shoot a whole day of hiking with previous night’s indoor, lightbulb-based setting. This leads to color shifting, and unless you’re using a RAW image format (many cameras only offer JPEG), all you can do is to seek help with an editing plugin like The Imaging Factory’s White Balance.
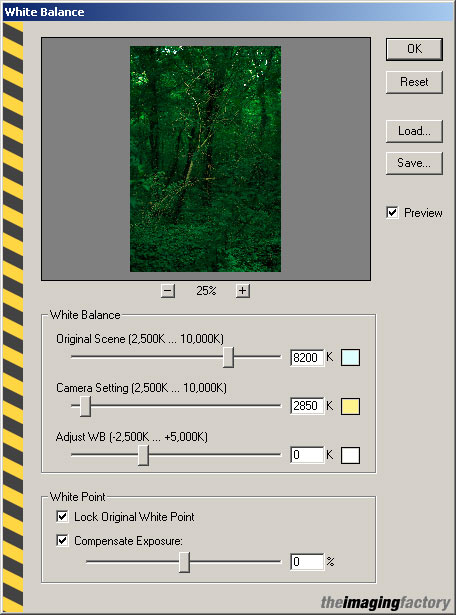
The White Balance section of the dialog contains three sliders. These specify the extent of modification in Kelvins (K).
Original Scene sets the actual correction, more exactly the value you should have used when taking the photo. Sticking to the example above, if you have used a lightbulb setting for a sunlit landscape, you should set about 5500 K, the value for sunlight.
Camera Setting is for specifying the incorrect value you have actually used. In the example, this is a lightbulb setting, about 2800 K.
Here’s a brief list about usual light sources and their color temperatures:
1700 K: A burning match
1850 K: Candlelight
2800 K: A lightbulb
3350 K: Studio lighting
3400 K: Studio lights
4100 K: Moonlight
5000 K: Sunlight
5500 K: Average sunlight, flashbulb
5770 K: Strong sunlight
6420 K: Xenon light
6500 K: Neon light
9300 K: TV screen (analogue)
Adjust WB serves for refining the above setting if you are not satisfied with the result. Drag it to the left for warmer and to the right for colder colors.
The last section is White Point. Select Lock Original White Point to make the software take into consideration the originally white areas of the photo and leave them unchanged. You are advised to do so if you want to have naturally-looking results as otherwise the plugin tends to discolor white areas.
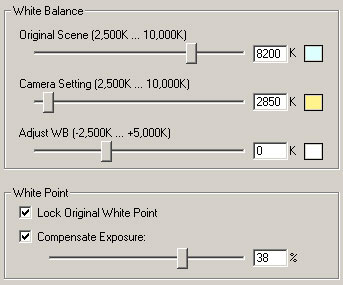
Compensate Exposure sets the lightness of the photo after modification. The picture might look a bit darker because of the change. The slider corrects this effect, although it can also be used to darken the picture. Select its check box to activate it.
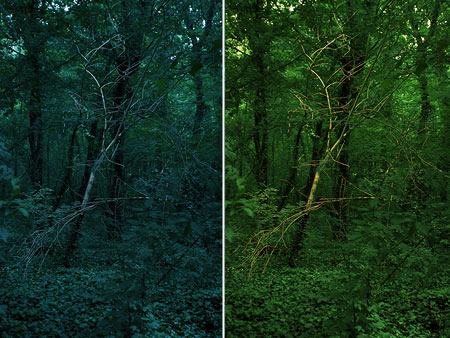
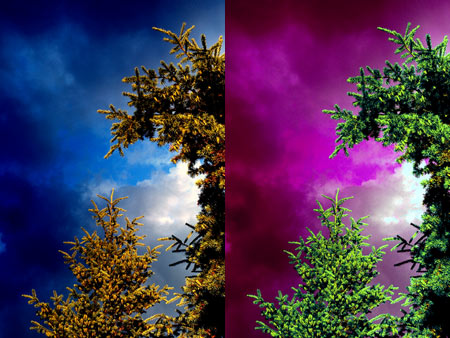
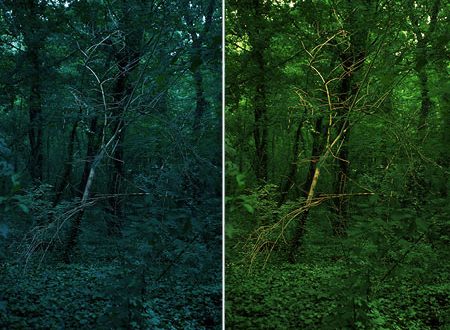
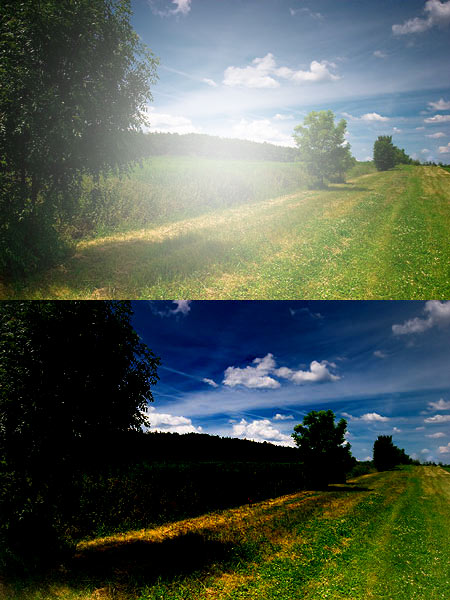
The above picture was taken in a forest, but the white balance setting has been left on lightbulb (2800 K). In the forest, however, you’ll find much colder colors. We have set a colder value (8200 K) on the first slider, and the one we mistakenly used (2800 K) on the other. We have refined a bit with the third as we liked, and lightened the picture a bit (about 35%) with the fourth. The colors have changed to a hearty warm green from the messed up bluish.
So much for the best of The Imaging Factory’s stuff. The company offers a good dozen of other accessories, e.g. Soft Focus and Unsharp Mask tools as well as custom Convert to B&W plugins.