Today’s topic is setting white balance (WB).
Since we most often work with RAW files in Lightroom, this will be a piece of cake. With this file type white balance can be set afterwards without deterioration of image quality. It can work with JPEG files as well but a relatively higher color shifting will clearly damage image quality. But we can play freely with RAW files. We can try other kinds of white balance settings or we can adjust the old, not fully tuned values. What’s more, if we used completely wrong values and the colors went berserk, there’s no need to despair because it’s easy to fix this problem.
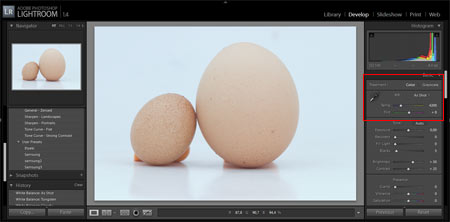
The white balance setting options are to be found at the beginning of the right side column under Develop in the Basic section. If this window is not open, click on the arrow beside the title to open it.
The first line is Treatment. It’s used for setting the basic color management. The Color option results a colored photo, while Grayscale converts it to a black-and-white one. But let’s just go further as these are not closely connected to white balance.
The WB setting contains the usual factory settings used with cameras. By default we get the As Shot option, this is the factory setting of our camera. If you do not plan to alter white balance, leave this option as it is. But we do plan to alter it, otherwise why would we be writing this article. The menu next to WB offers the following options.
As Shot: the original WB setting of the camera.
Auto: Automatic white balance correction.
Daylight: Colors set for daylight lighting (when the theme is lit by sunlight).
Cloudy: for pictures taken in cloudy weather.
Shade: Pictures taken in shady lights.
Tungsten: for pictures taken in the light of a lightbulb.
Fluorescent: for pictures taken at neon light.
Flash: for pictures taken in flash mode.
Custom: Your custom settings.
When clicking on any of the above, we get previously set color temperatures. If none of them results the appropriate colors, you can resort to Custom option and further WB settings. You will find two sliders under the menu. Shift eighter of these and Lightroom switches to Custom settings.
On Temp slider you can set the exact color temperature in Kelvin, even with only +/-1 grade if you like. You can write in the estimated value in the window on its right, just click on it once. Also the slider shows that we receive colder color temperature (shifted towards blue) when we set the value low. When set to a higher value, it yields warmer colors (shifted towards yellow). Obviously, if the blue is too strong in the picture, for instance, even the white walls fade to blue, we need to set the value on the slider in positive direction and recover the warm colors.
By applying the slider below, called Tint, the hues can be fine-tuned. Shift it to the left and you’ll get greenish shades, while the right side accentuates the purple range. By clicking on the window on the right, again, you can type the estimated value.
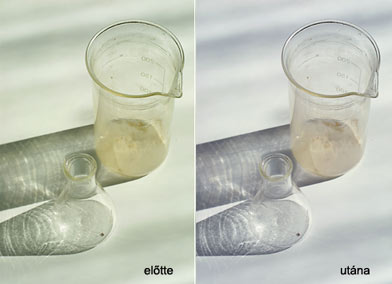
In case the photo has a surface that was originally white or gray, then you can use the eyedrop in the upper left corner.
Click on it, then on the white/medium gray area and the original colors are restored. We “tell” the program simply this: This is the default white/gray, adjust the rest to this. If you drag it above the photo it will give you RGB information about the selected area (see the floating window).
It helps a lot if our photo contains white background or we took a shot of a gray card previously in the same lighting. Then all it takes is just one click to get an accurate result.