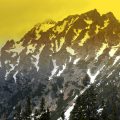
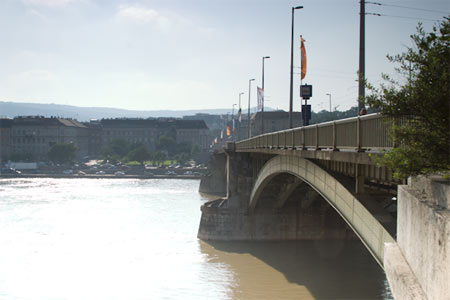
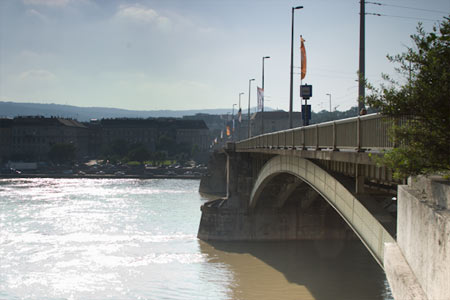
The left side is brighter
Gray filters have been in use for a long time to adjust the exposure of photos. One variant is the gradient filter which darkens one side of the picture. You should apply it in cases where you expect one part of a picture will be overexposed compared to the rest. Landscape photography provides good examples when one has to include the bright sky and a shadowed landscape in the same photo but the camera is not able to handle such a high contrast.
The gradient gray filter can also be used in post-production, since Lightroom versions 2.0 and up contain such a tool, and 16-bit RAW files give much more freedom for post-adjusting brightness than a compressed 8-bit JPG.
The left side of this photo is obviously much brighter, since this is where the light comes from. If you try to darken the whole picture, the difference won’t diminish. However, this is exactly what we want to achieve. So a gradient filter is what we need here.
That special one…
The filter is in the upper button bar of the Develop section, and it goes by the name Graduated Filter. Click it to display a dialog with its options. Let’s see what those options do!
Options
We have quite a few things to choose from. It is not only the exposure (that is, brightness) you can control with gradient filters, but also saturation, contrast or sharpness.
However, right now we need Exposure since this is what we want to decrease on the left side of the image. To do this, select the “minus” sign under Exposure. Use the Amount slider to specify the extent of adjustment. In this case, we used a value of -1.2 EV. This is how much the left side will be darkened.
Here comes the gradient
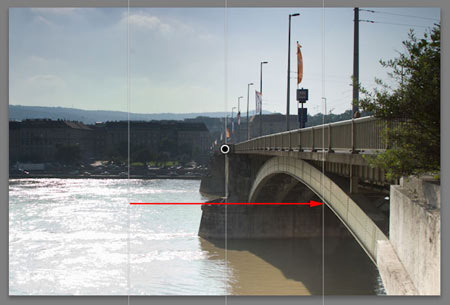
Drag a straight line for the gradient from the left one-third of the picture to the right one, You’ll see the left side getting darker instantly, and the right side remaining as bright as it was.
Fine tuning
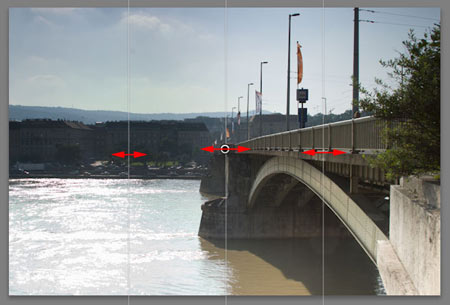
The position and size of the gradient is marked by three lines. All three can be moved by dragging.
The middle one, marked by a circle, controls the position of the whole gradient. You can drag it to move the effect to the left or right.
The ones on the sides control intensity of the gradient.
Spread evenly
After you’re done, click Close on the lower right of the gradient dialog. This gets rid of the dialog and the marker lines, but the gradient remains in effect.
Now it should be obvious how much this virtual filter has helped. To compare the adjusted photo with the original, hover your mouse pointer over the image.