In the previous Photoshop tip about lightness, we have introduced one of the basic correction options in Photoshop, the Levels dialog. Now we take a look at a similar feature, Selective Colors, which is primarily for modifying colors, but can also be used for setting lightness, also by separately specifying different values for highs, midtones and shadows. Despite the number of options, you can still reach your goal in a step or two, so don’t worry!
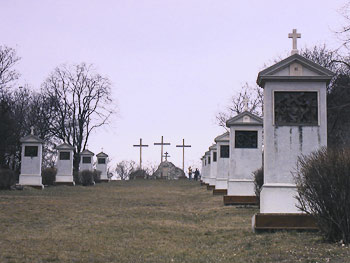
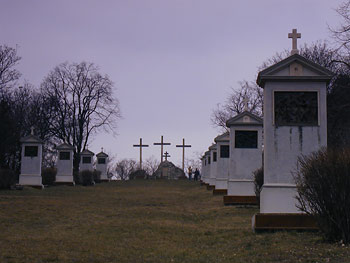
This picture is strongly underexposed. We want to produce a more enjoyable, lighter version.
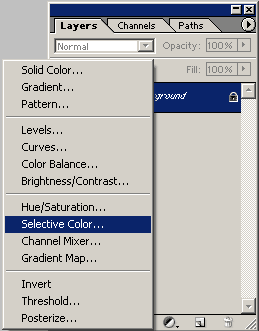
Click Create New Fill or Adjustment Layer (the black-and-white circle) on the Layers palette, then choose Selective Color from the dropdown.
A dialog appears. Select Absolute at the bottom. From the Colors list, you’ll only need three values now: Whites (highs), Neutrals (midtones), and Blacks (shadows). You’ll use them to set the lightness of the picture.
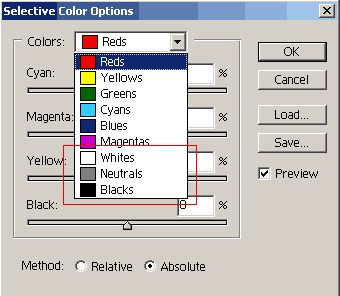
Start with Neutrals as this sets the lightness for the midtones. Use only the lower slider (Black). The other sliders affect the colors that we do not want to change now. After Neutrals, change Whites and Blacks. The former affects white and related tones (that is, the brighter areas), while the latter is for black and its “friends”, shadowed areas.
In the example, we have set Neutrals to -35, Whites to -10, and Blacks to -5 to make all three lighter.
If you’re satisfied with the result, click OK, and use Layer/Flatten Image to merge the layers. Save the image, and you’re done!