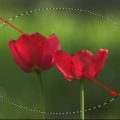
Darkening corners can be unwanted in lots of cases, but for some themes they provide an interesting effect. So the thing you should eliminate in some pictures is worth adding in others. In the following example, we use an oval selection to darken the picture’s corners, thus emphasizing the main theme and adding an oldish feel to the image.
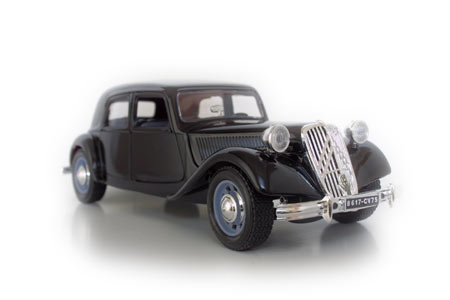
Load the photo in Photoshop Elements
When dealing with an antique themed object, building or portrait photo, you can highlight the main theme by using vignetting as a frame of sorts. Most of the time this effect is undesirable and you should avoid it, but in this case it will be an integral part of the image.
Oval

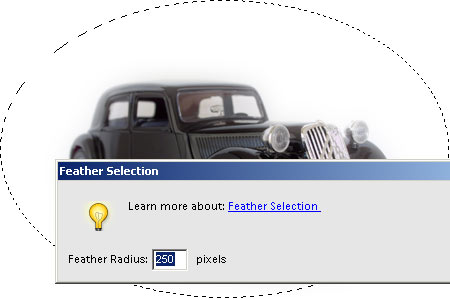
We need the frame in an oval shape, with the darkening gradually increasing from the light center towards the corners. First, select the Elliptical Marquee Tool, and drag a selection from the upper left corner to the lower right one. This way, the central area will be selected in an oval shape which leaves out the corners.
Soft edges
We need a gradient darkening, so we have to blur the hard edges of the selection.
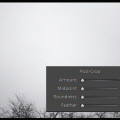
Right-click somewhere in the selection, and click Feather in the context menu. This enables softening the selection border. Use a high value! The maximum is 250, and for larger images, this is recommended. When working with a picture for web, not larger than 800×600 pixels, 50 pixels will be enough. Now click OK.
As currently the middle of the picture is selected, and we want to adjust the corners, right-click the inside of the selection again, and click Select Inverse. This inverts the selection. If you do not want to see the marquee, press Ctrl+H to hide it. Of course this does not cancels the selection.
Darkness in the corners

All you have left to do is to darken the corners. Click Enhance/Adjust Lighting/Levels (or press Ctrl+L). On the dialog, you just have to drag the white arrow on the right under Output Levels to the left, and keep checking the effect in the picture. The corners will be darkening. Drag the arrow until you have the desired effect. If you need an even stronger vignetting, drag the dark arrow on the left under Input Levels to the right.
When you’re done, click OK, and press Ctrl+D to cancel the selection.
Oldtimer
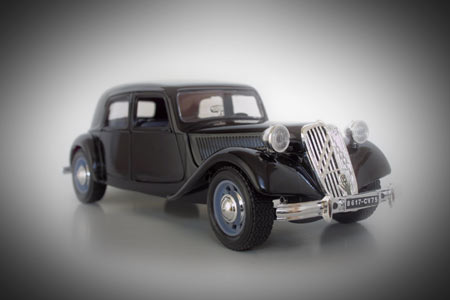
The final image displays the effect quite forcefully, but now it is not caused by chance or a defect in the lens, but our meticulous work.