Now comes another popular topic, lightening dark, shadowy picture parts in a way that light areas hardly change. There are numerous solutions for this in Photoshop and we have chosen a very simple one to discuss.
Load the photo in Photoshop
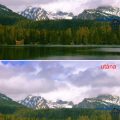
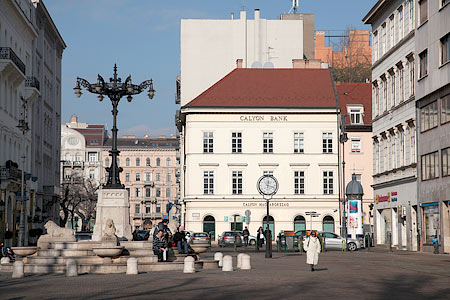
Previously we discussed increasing contrasts. Here’s a photo with quite a lot of contrasts, where the darker, shadowy areas are a bit exaggerated, too dark. We would like to lighten these in a way that the brighter areas remain almost unchanged.
Gamma gun
The tool for setting exposition was introduced in Photoshop CS versions, and it is to be found under Image/Adjustments/Exposuremenu.
Our main tool for lightening dark areas is Gamma Correction slider. You have to push the slider value to the left this time, and as a result, the darks areas will get some fill light from the software. We have used a value of 1.75.
A little black

Practically that was it all. There’s a little thing you can do in addition, because in some cases Gamma correction may turn the blacks a bit greyish.
In such cases you can resort to the middle, Offset setting, which strengthens the darkest pixels into the negative direction (push slider to the left for this). But be careful with this tool: a too high value may result extremely dark shadows with sharp edges. A value of – 0.002 – 0.003 is usually optimal. It is a small modification, but it adds some power to the blacks. Go below –0.0005 only if it’s really necessary, otherwise your photo will be a bit ruined.
Insight into shadow world
Take a look at the picture above and compare it with the original version. Quite a difference. The formerly too dark shadowy parts are living a new, brighter life, while there’s hardly any change detectable in the bright areas.
Be careful when increasing Gamma, because a too high value weakens contrasts in the picture seriously, making it dull. Increasing Gamma also diminishes color brightness, so a bit of a saturation increase afterwards is strongly recommended. We’re done. You can save the picture now.
Advanced version (!)

Those more experienced in photo editing can use a layer-correction mask for Exposition, and can mix the mask received with Luminosity effect mode and the original picture. This way only the change in brightness will be seen, the colors remain untouched.